In order to keep your search indexes up-to-date, you need to re-index them regularly. This topic describes how to do it.
Windows automatically updates its index whenever a file changes or gets added.
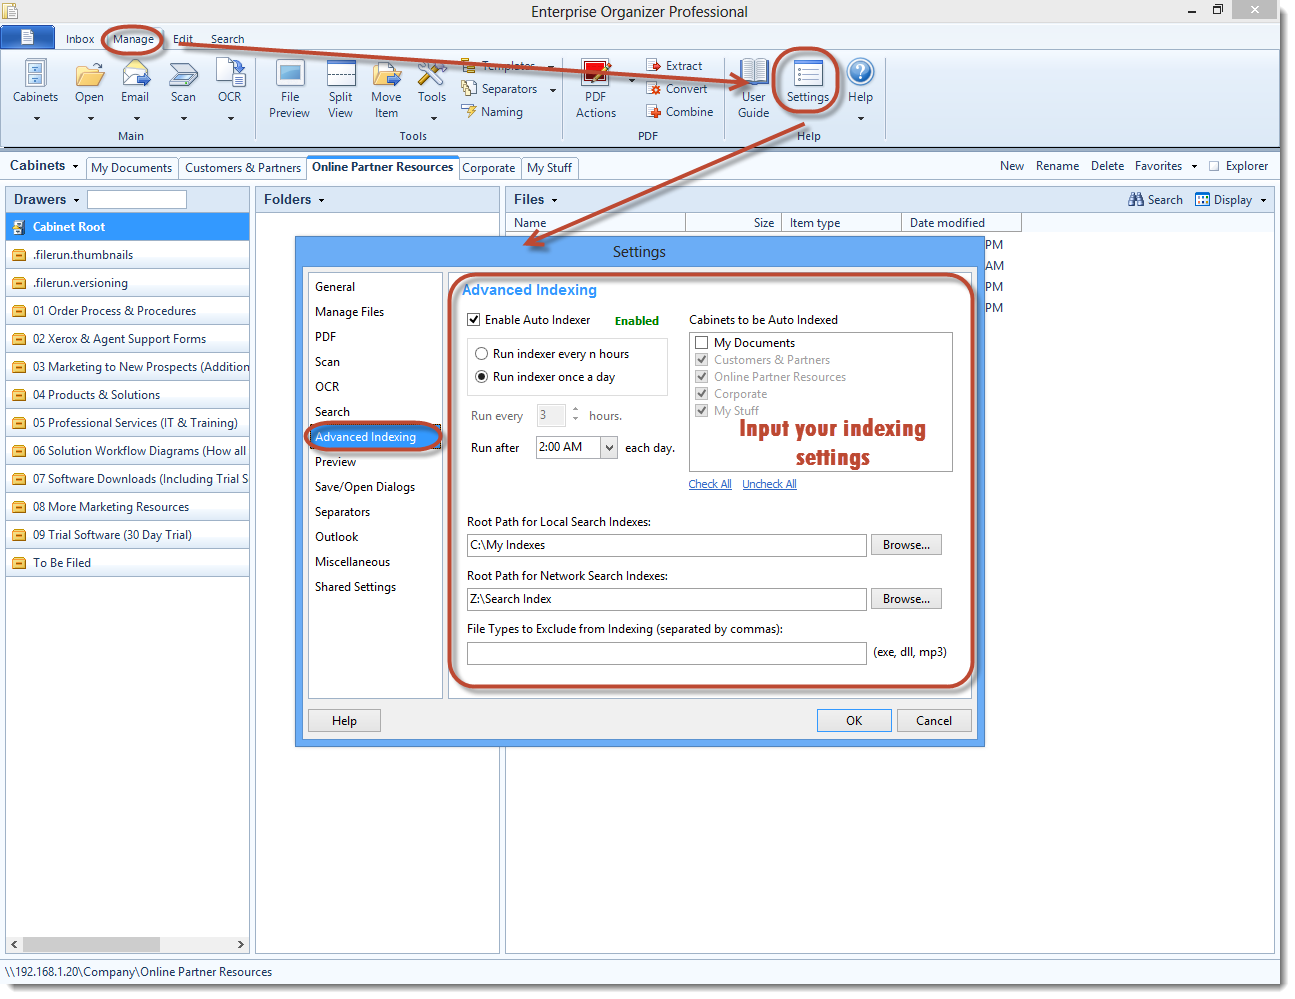
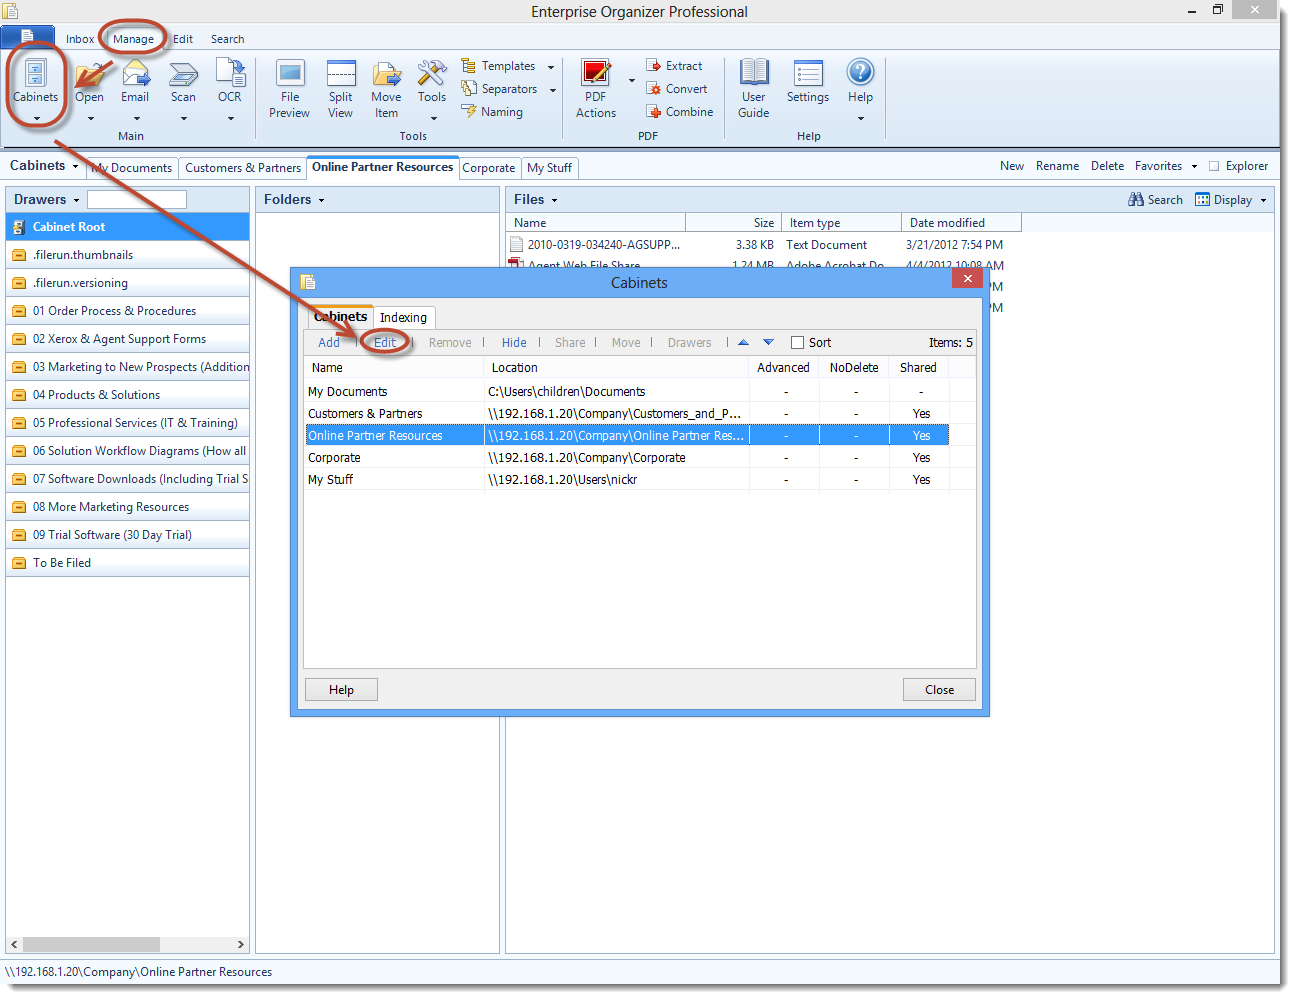
Normally auto-indexing is enabled by selecting the Add Cabinet to Automatic Index List option when you create or edit a cabinet. You can also use the instructions below to change this setting for a cabinet.
To activate automatic indexing for a cabinet, do one of the following:
Or,
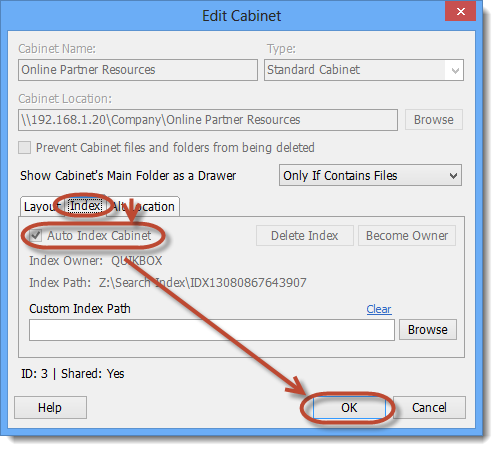
The indexes will now be updated every time the auto-indexer runs. Updating simply means that documents created or modified since the last refresh time will be added to the index, and deleted documents will be removed.
For more information on index settings, see Indexing Settings.
Article ID: 207
Created On: Tue, Oct 29, 2013 at 5:28 PM
Last Updated On: Tue, Jun 24, 2014 at 9:59 AM
Authored by: KB Admin01 [[email protected]]
Online URL: https://kb.quikbox.com/article.php?id=207