Handling Appointments & Active Cases
In many offices, you only work with a small subset of your clients, customers or patients at a time. For example, in a medical practice your primary concern is just dealing with the daily appointments. If you could "pull" those patient records in advance, it would speed up your workflow and reduce mis-filings.
You can do this in Enterprise Organizer Pro by setting up a special "Appointments" cabinet that only shows the patients or clients who have appointments. This topic describes how to set up the cabinet. The steps below will describe this for appointments, but the same technique will also work for other situations, like active cases in a law firm. Just use a cabinet name that makes sense for your situation.
Step 1: Set Up the Cabinet
The first step is to create an Advanced Cabinet to hold the appointment drawers. That sounds intimidating, but it’s simple and straightforward. Just follow these steps:
- Click the Cabinets button
- Click Add
- Call the new cabinet Appointments
- Select Use Default Location
- For the cabinet Type, select Advanced
- Click OK
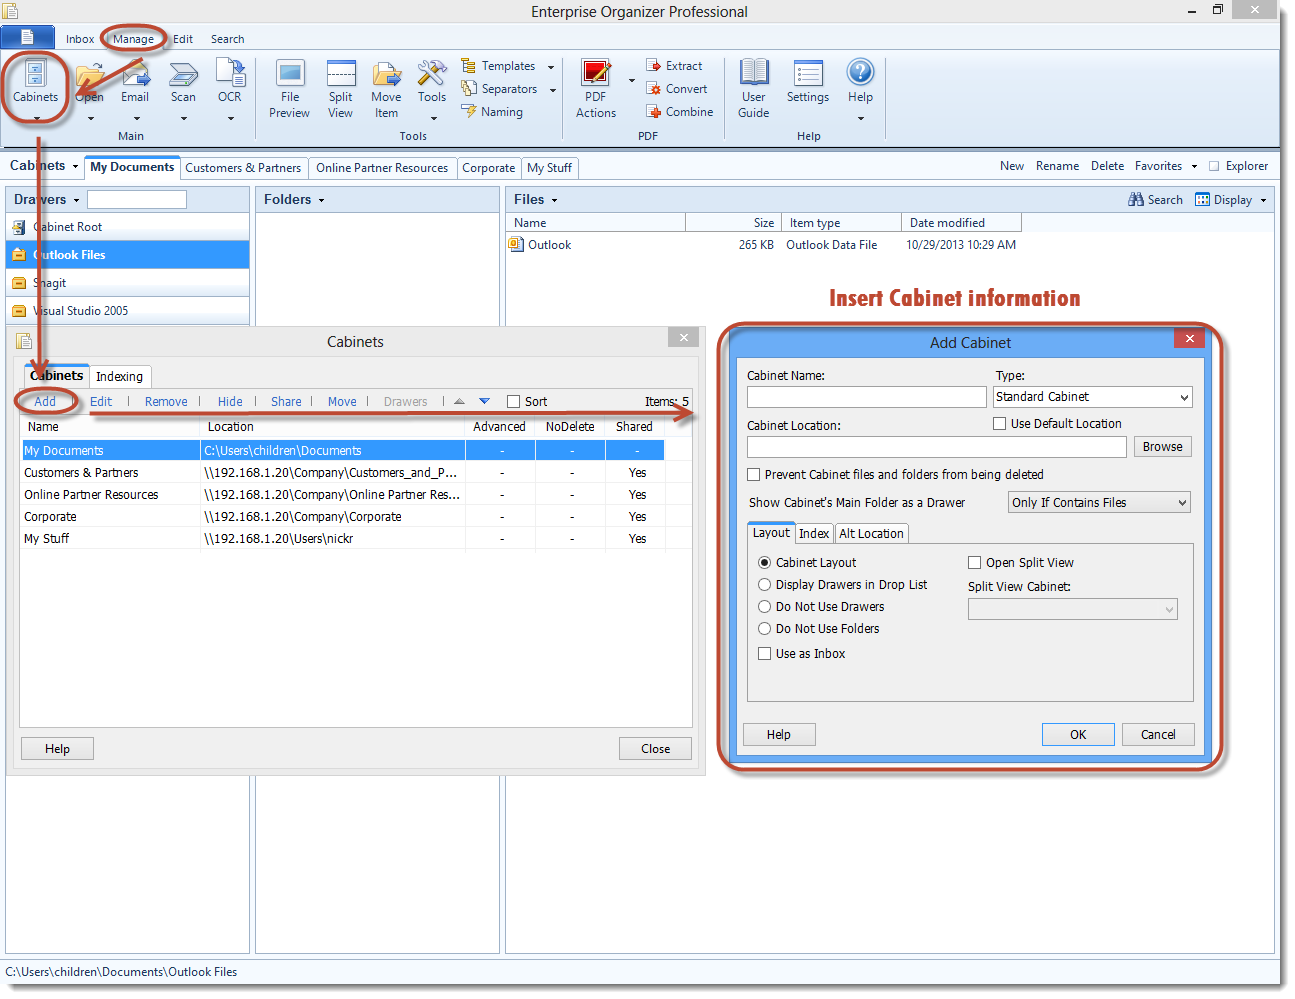
You’ll now have an empty Appointments cabinet.
Step 2: Pin Drawers to the Cabinet
Now you can start "pinning" drawers to the Appointments cabinet:
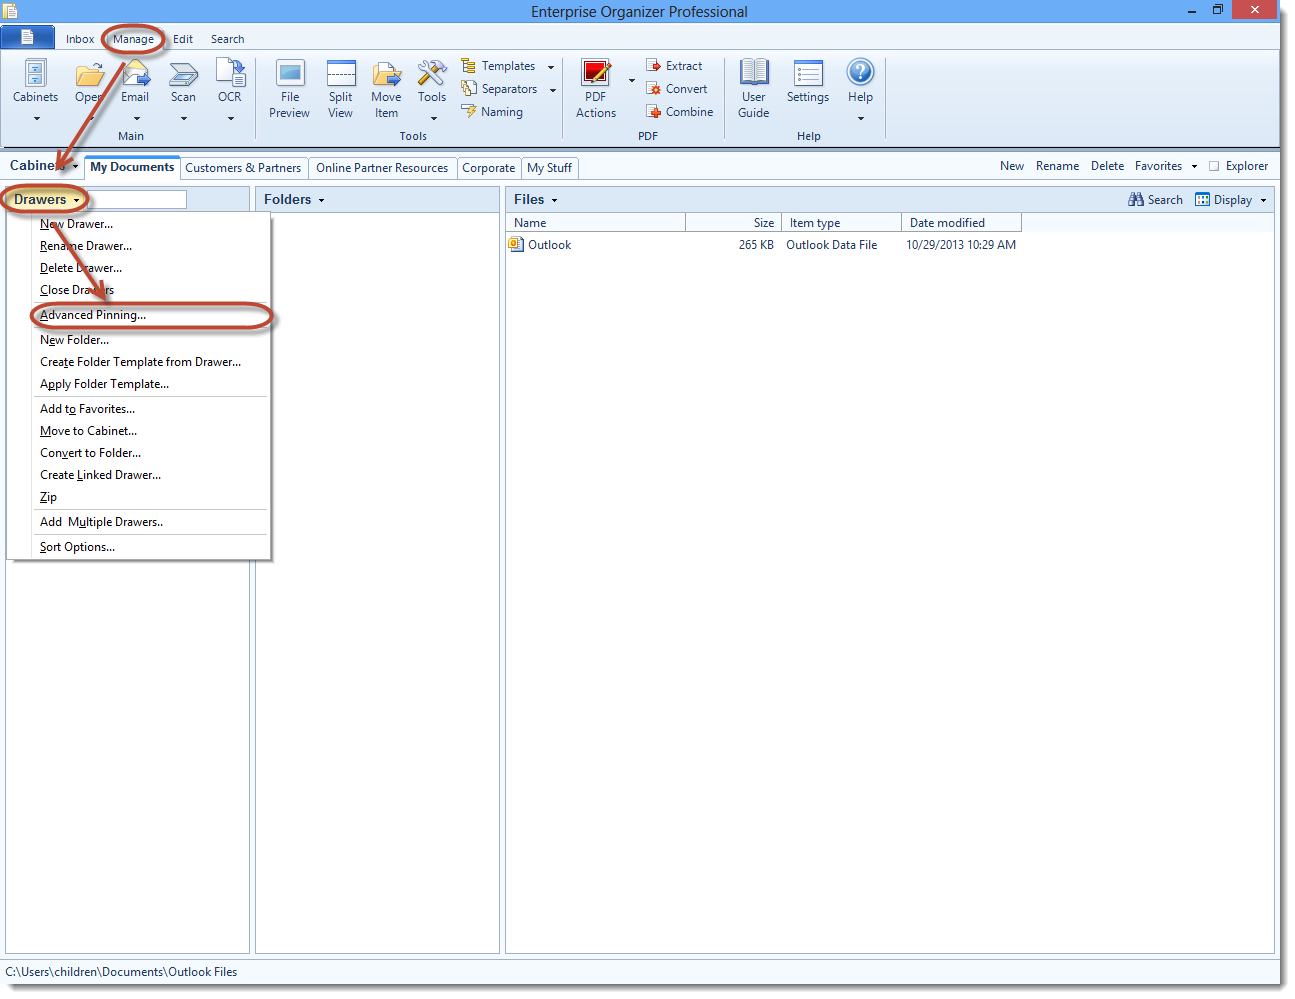
- Browse to the drawer of a patient who has an appointment
- Click the Drawers task button
- Select Pin to > Appointments
- Select Yes when asked to confirm
That’s it. Now switch to the Appointments cabinet. You’ll see the patient’s drawer. If you select the drawer and notice its path, you’ll see that the drawer itself hasn’t moved – it still resides in its original cabinet. But by pinning it to the Appointments cabinet, you have quick access to the drawer without having to hunt for it.
You can also pin more than one drawer at a time:
- Click the Drawers task button
- Select Advanced Pinning or Pin Drawers
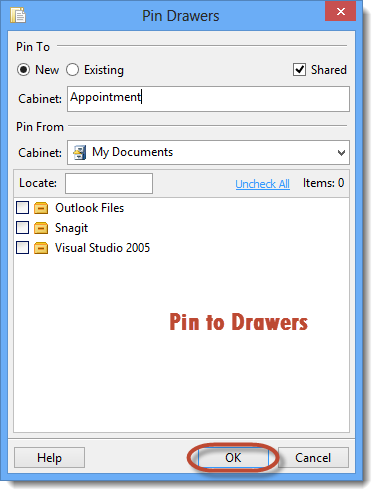
- Select the Appointments cabinet on top
- On the bottom, select the cabinet that has drawers you want to pin
- Put a check mark next to each drawer you want to pin
- Click OK
Go ahead and pin the drawers for the rest of your upcoming appointments.
For more information on pinning, see Pinning Drawers.
Step 3: Clear the Cabinet
At day’s end, you’ll want to empty the Appointments cabinet to make room for the next day’s appointments. Here’s how to clear out all of the pinned drawers:
- Go to the Appointments cabinet
- Click the Drawers task button
- Select Manage Drawers
- Select Remove All Drawers
- Select Yes when asked to confirm
- Click OK to close the dialog
This will remove all of the drawers from the Appointments cabinet, but it will NOT delete the files themselves. Your patient drawers will continue to reside in their original cabinets. They are simply "unpinned" from the Appointments cabinet.
