Cloud Setup
Enterprise Organizer Professional works flawlessly with a number of different cloud services. This gives you the flexibility to choose the cloud service that fits your needs the best. This topic will explain how to set up EOP to work in typical cloud scenarios.
What Kind of Cloud Service Are You Using?
There are two basic kinds of cloud services:
- Cloud Synchronization
- With this type of service, your files are still on your computer, but a copy gets synchronized to the cloud. Your files might even get synchronized across multiple computers and devices. The classic example is Dropbox. Others include SugarSync, Google Drive, and Microsoft SkyDrive. Enterprise Organizer Professional works best with this type of service.
- Cloud Hosting
- With this type of service, your files reside exclusively in the cloud. You usually access them through a web browser. The classic example is a SharePoint server. Enterprise Organizer Professional has more limited support for this kind of service.
Cloud Synchronization
Synchronization-type services usually put a special folder on your C: drive. Everything in this folder gets synchronized to the cloud. To make Enterprise Organizer Professional work in the cloud, just put your Enterprise Organizer Professional cabinets in this folder. Then all of your Enterprise Organizer files will move to the cloud automatically.
Finding the Right Folder
With most cloud services, you can look in the program’s preferences to find the folder they use. Using Dropbox as an example, you can right-click on Dropbox’s icon in the system tray (next to the clock on the lower right-hand corner of your screen), select Preferences, then see the folder in the Advanced section. It’s called Dropbox Location.
Here’s another way to find the folder if you know how to open it:
- Open the folder
- Right-click on the address bar at the top
- Select Copy Address as Text (Windows Vista or newer), OR
- Select the address and copy it (Windows XP)
For Dropbox, you’ll find the folder at C:Users[username]Dropbox.
Moving Your Cabinets to the Folder
Once you’ve found your cloud service’s folder, you can move your Enterprise Organizer cabinets into it. Here’s how:
- Click Enterprise Organizer’s Cabinets button
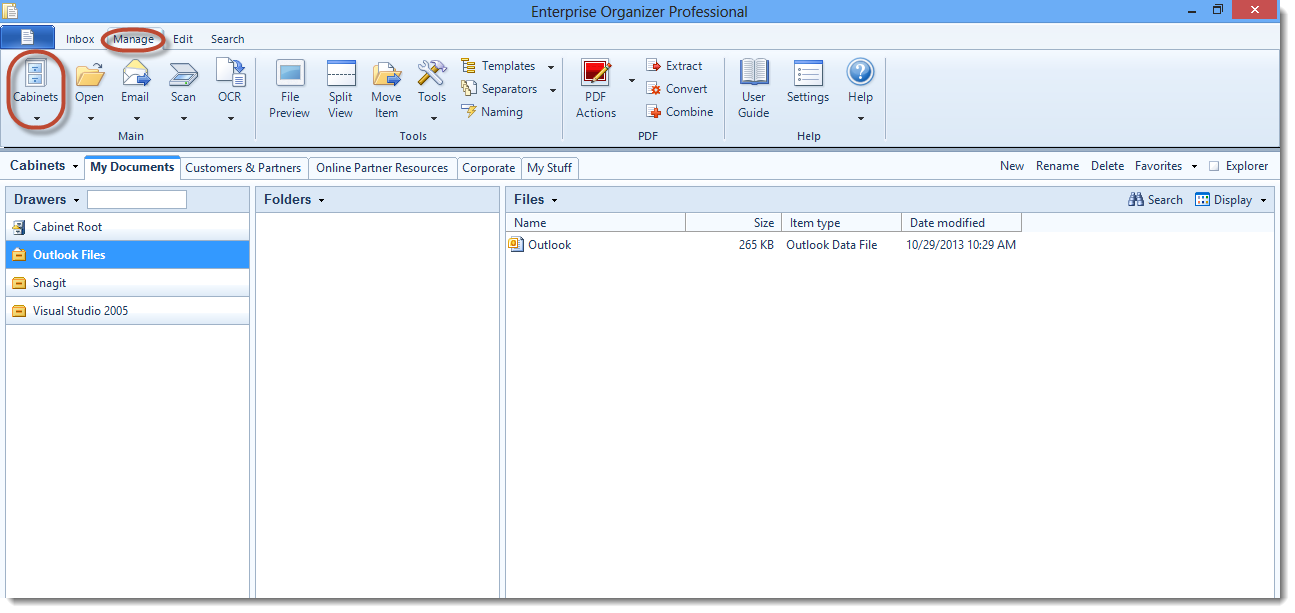
- Select the cabinet you want to move;Click the Move button
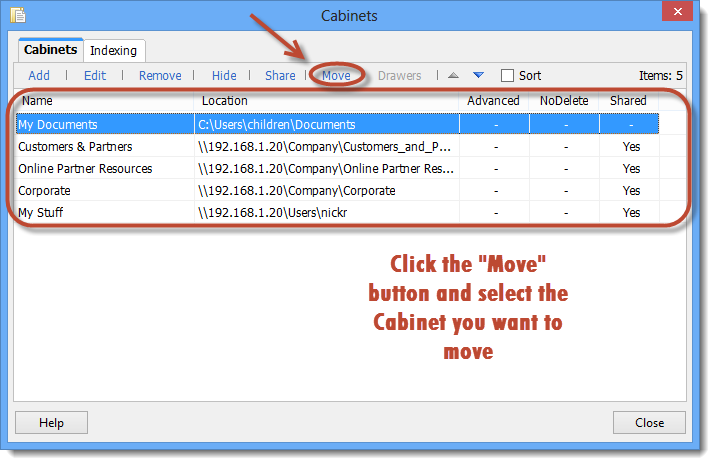
- Enter the cloud folder’s path
- Click OK
This will move the cabinet and update Enterprise Organizer to the new location.
In the future, be sure to create all of your cabinets in the cloud folder. To make the cloud folder the default location for new cabinets, change Enterprise Organizer’s Default Cabinet Root Path to the cloud folder. See File Management Settings for more information.
Your Enterprise Organizer Professional data might not show up on the cloud immediately. Depending on how much data you have, it could take hours or days for your cloud service to upload it all.
Cloud Hosting
Hosted services keep the only copy of your files on their servers. In other words, you access your files on the Internet instead of on your hard drive.
Enterprise Organizer Professional, on the other hand, expects your files to be on your hard drive, which presents a problem. Because your files are on the Internet, Enterprise Organizer can’t see them.
The solution is a mapped drive. Think of a mapped drive as a way of making it look like the cloud files are a drive on your computer instead of the Internet. You’ll see a drive letter, just like any other drive on your computer, but when you select it, you’ll see your cloud files.
Accessing your files across the Internet is much, much slower than having them on your machine! Expect it to take a lot longer to navigate folders and open files.
Setting Up a Mapped Drive
First, be warned that not all cloud providers support mapped drives. If they do, they might have already set one up, or they might have specific instructions for setting one up.
Another option is Gladinet, a service that specializes in providing mapped drives to the most popular cloud hosts.
If you need to map the drive yourself, here’s how:
- Your need an address that gives you directaccess to your cloud files, like:
- http://some.cloud.provider/my_library
- some_servermy_library
- Know your username and password for accessing your cloud files
- Open Windows Explorer
- There should be two panes: a folder tree on the left and your files on the right
- Right-click Network or My Network Places on the left (near the bottom)
- Select Map Network Drive
- Select the drive letter you want to use
- Put the address from step 1 in in the Folder field
- Select Reconnect at logon
- Select Connect using different credentials
- Provide your username and password
- Click Finish
If everything works, a new drive will show up in Windows Explorer. The drive will show your cloud files.
Moving Your Cabinets to the Drive
Once you have the cloud drive working, you can move your Enterprise Organizer cabinets onto it. Here’s how:
- Click Enterprise Organizer Professional’s Cabinets button
- Select the cabinet you want to move
- Click the Move button
- Enter the cloud drive
- Click OK
This will move the cabinet and update Enterprise Organizer Professional to the new location.
In the future, be sure to create all of your cabinets on the cloud drive. To make the cloud drive the default location for new cabinets, change Enterprise Organizer’s Default Cabinet Root Path to the cloud drive. See File Management Settings for more information.
It can be very slow moving your Enterprise Organizer data to the cloud drive. Depending on how much data you have, it could take hours or even days to complete the transfer.
